Step 1 - Open Dreamweaver and create a new Site.
Setting up your Site tells Dreamweaver where your hard drive web page files are located and to where those files should be uploaded.
In the opening screen, click Create New Dreamweaver Site.

Step 2 - Set up your site
Enter a name for your site in the first text box (i.e. Genomics 2007 Project). This will be the name of the folder on your computer.
The HTTP Address of your site is
http://bio.davidson.edu/courses/genomics/2007/
Enter this in the second text box.
Click Next >.
Step 3 - Server Technology? No.
On the next screen, Dreamweaver will ask if you "want to work with a server technology such as ColdFusion, ASP.NET, ASP, JSP or PHP?" Select "No, I do not want to use a server technology." Click Next >.

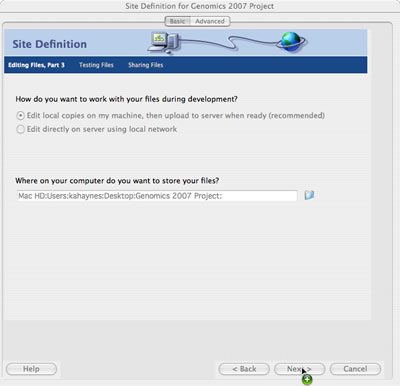
Step 4 - Handling files
Select "Edit local copies on my machine, then upload to server when ready (recommended)"
Enter where you want your folders to be stored on your computer. The default selection will create a folder on your desktop named after your Site.
Click Next >.
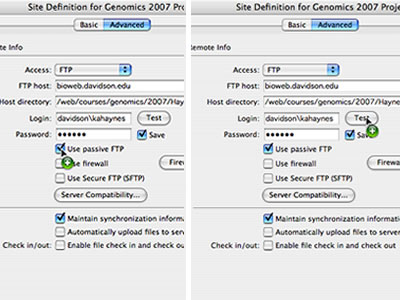
Step 5 - FTP set-up
Select FTP as the connection method.
Enter bioweb.davidson.edu as the hostname/ FTP address.
Enter /web/courses/genomics/2007/YourLastName/ as the folder on the server to store your files in. Replace YourLastName with your last name (capitalized). This folder was created for you by your instructor.
Enter davidson\ followed by your user name (same as your e-mail name) as your FTP login.
Enter your password (same as your e-mail password) as the FTP password. To avoid having to reenter your password at each upload, select Save.
Click the Advanced button at the top to go to advanced settings.

Step 6 - Set FTP to "passive" and test connection
Select "Use passive FTP"
Click the Test button. You should see a pop-up message that reads "Dreamweaver connected to your Web server successfully."
Click OK.
Click the Basic button at the top to return to basic settings. Click Next >.
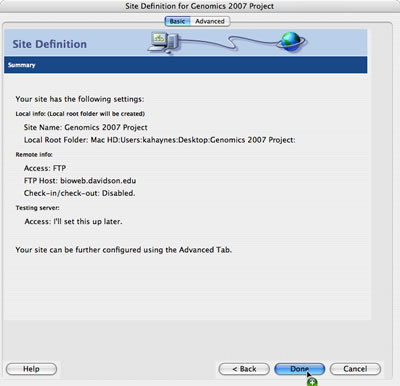
Step 7 - Checking in/ out? No. You're done.
In the next window, Dreamweaver will ask "Do you want to enable checking in and checking out files, to ensure that you and your co-workers cannot edit the same file at the same time?" Select "No, do not enable check in and check out." Click Next >.
The next window shows a summary of your Site's settings (like the example on the right). Click Done.
Dreamweaver is now ready to help you edit your site.
Step 8 - Start editing your site.
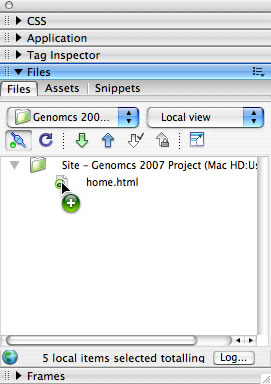
Make sure the Files window is active (shown to the right). If you don't see this window, click Window in the top menu, and select Files).
Your Site folder should be visible. Right now it is empty.
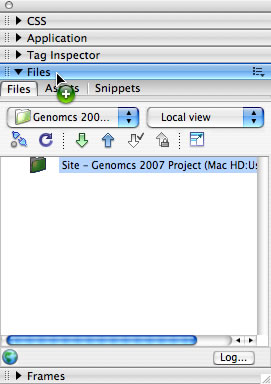
Step 9 - Download and edit your home page.
To retrive your template home page (provided by your instructor) click the green down arrow.
Dreamweaver will ask "Are you sure you wish to get the entire site?" Click OK. A file called home.html appears in your Site folder.
Now that your home page is in your local folder you can edit it. To open and edit this html file in Dreamweaver, double click on the file.
A new window containing the page (in edit mode) will appear on your screen.
Step 10 - Edit and upload your pages/ files.
When you create image files using Fireworks, Photoshop, PowerPoint screen shots, etc., be sure to save them into your Site folder (in this case “Genomics 2007 Project” on the desktop). New files should appear in the Dreamweaver Files window. If not, click the Refresh button (blue circular arrow) in the Files window.
To upload your new files to the server, select the file(s) you wish to upload, then click the blue up arrow.
Dreamweaver will ask if you want to upload dependent files (such as images linked to a web page). Click Yes.
BIO309 Fall 2007: You will not be able to see the fancy tab layout as you edit your page in Dreamweaver. You must preview your page in a web browser at http://bio.davidson.edu/courses/genomics/2007/YourLastName/home.html to see the layout.