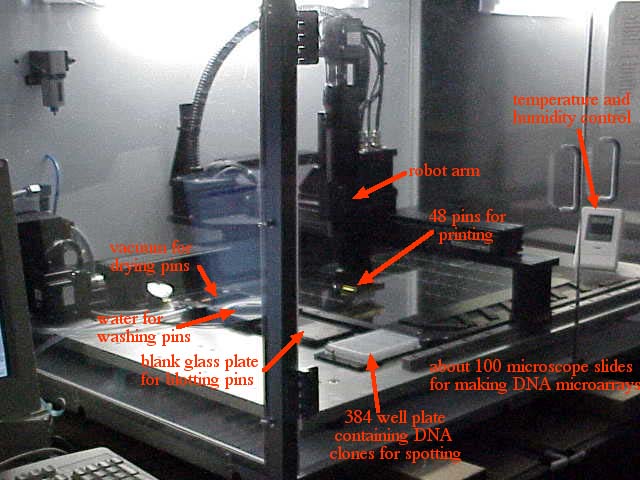
Figure 1. DNA micrarray robot enclosed in a temperature and humidity controlled environment. The temperature and humidity must be closely regulated or the spot sizes will vary or the printing pins will dry out too quickly.
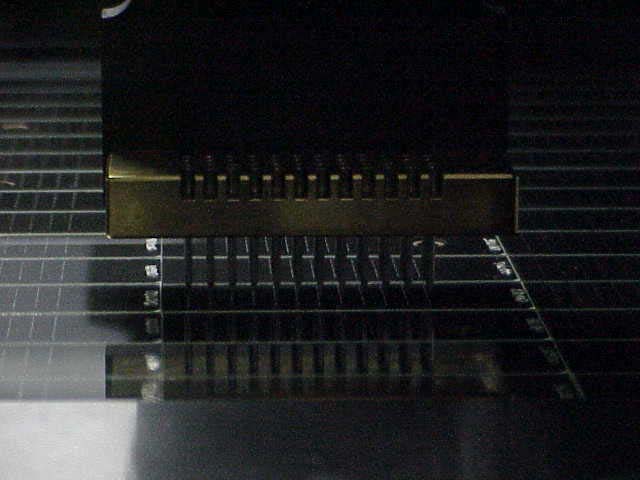
Figure 2. This shows the print head with 48 pins. Each pin is spring loaded and has a small slit in it which draws up the DNA solution by capillary action. You can see the rows of spotted DNA on the glass slides to the left of the print head; they appear as small grey lines. Each slide is numbered for identification.
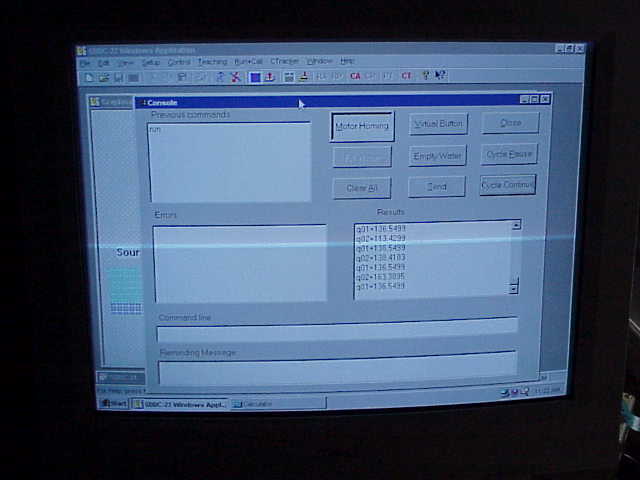
Figure 3. The robot is controlled by a computer with a graphic user interface (GUI) similar to a web page.
Movies
1) Loading the print head with DNA.
3) Suck out the remaining DNA and start the washing to clean the print head.
© Copyright 2001 Department of Biology, Davidson College, Davidson, NC 28036
Send comments, questions, and suggestions to: macampbell@davidson.edu